Manage AI models in the registry
The AI Model Registry is where every AI model the platform can use lives in one place. From here you connect providers, register their models, read what each model costs and where it's already in use, and pick the defaults the rest of the platform falls back on. This guide covers all of that, end to end.
A large language model, or LLM, is the AI that actually generates text, embeddings, or images. Those models come from providers (OpenAI, OpenRouter, Xference, and others), and each provider is wired in through a connector. The registry is the catalogue that ties it together: add a connector, register the models it exposes, inspect each model's pricing, publisher, and usage, and choose the platform default model for each kind of task so the rest of the platform inherits a sensible fallback.
Prerequisites
Before you start, make sure you have:
- Administrative access — an account with AI model management privileges.
- At least one connector — a configured provider (for example OpenAI, OpenRouter, Xference, or an OpenAI Compatible endpoint) so the registry has models to list.
Inspect a model
Open any model to see its full profile: what it costs, who published it, how it's built, and what's relying on it. Go to Settings → AI Model Registry and select a model to open its details. The sections below walk through each part of that view.
Read a model's pricing
Check what a model costs before you make it a default or point a new workload at it.
The Pricing section appears on a model's overview only for models that have pricing configured (for example a self-hosted model with a cost set). The platform stores raw per-second and per-token costs internally and scales them back into human-readable units, so you may see any of:
- Per request
- Per hour — the stored per-second cost × 3600
- Per 1M input tokens — the stored per-token cost × 1,000,000
- Per 1M output tokens — the stored per-token cost × 1,000,000
Pricing chips appear only when pricing is enabled for the model, and any row with no cost is hidden. A model priced only per token, for instance, won't show a per-request chip.
Read publisher and architecture
When a model is open source, knowing who published it and what architecture it's built on tells you what you're actually running.
Both facts show up in two places. In the model picker, each entry carries a publisher chip (with the provider's icon, falling back to the Hugging Face mark) next to an architecture chip — the architecture being the model's underlying design family, such as Llama or Mistral. Once the model is registered, its overview shows dedicated Publisher and Architecture fields.
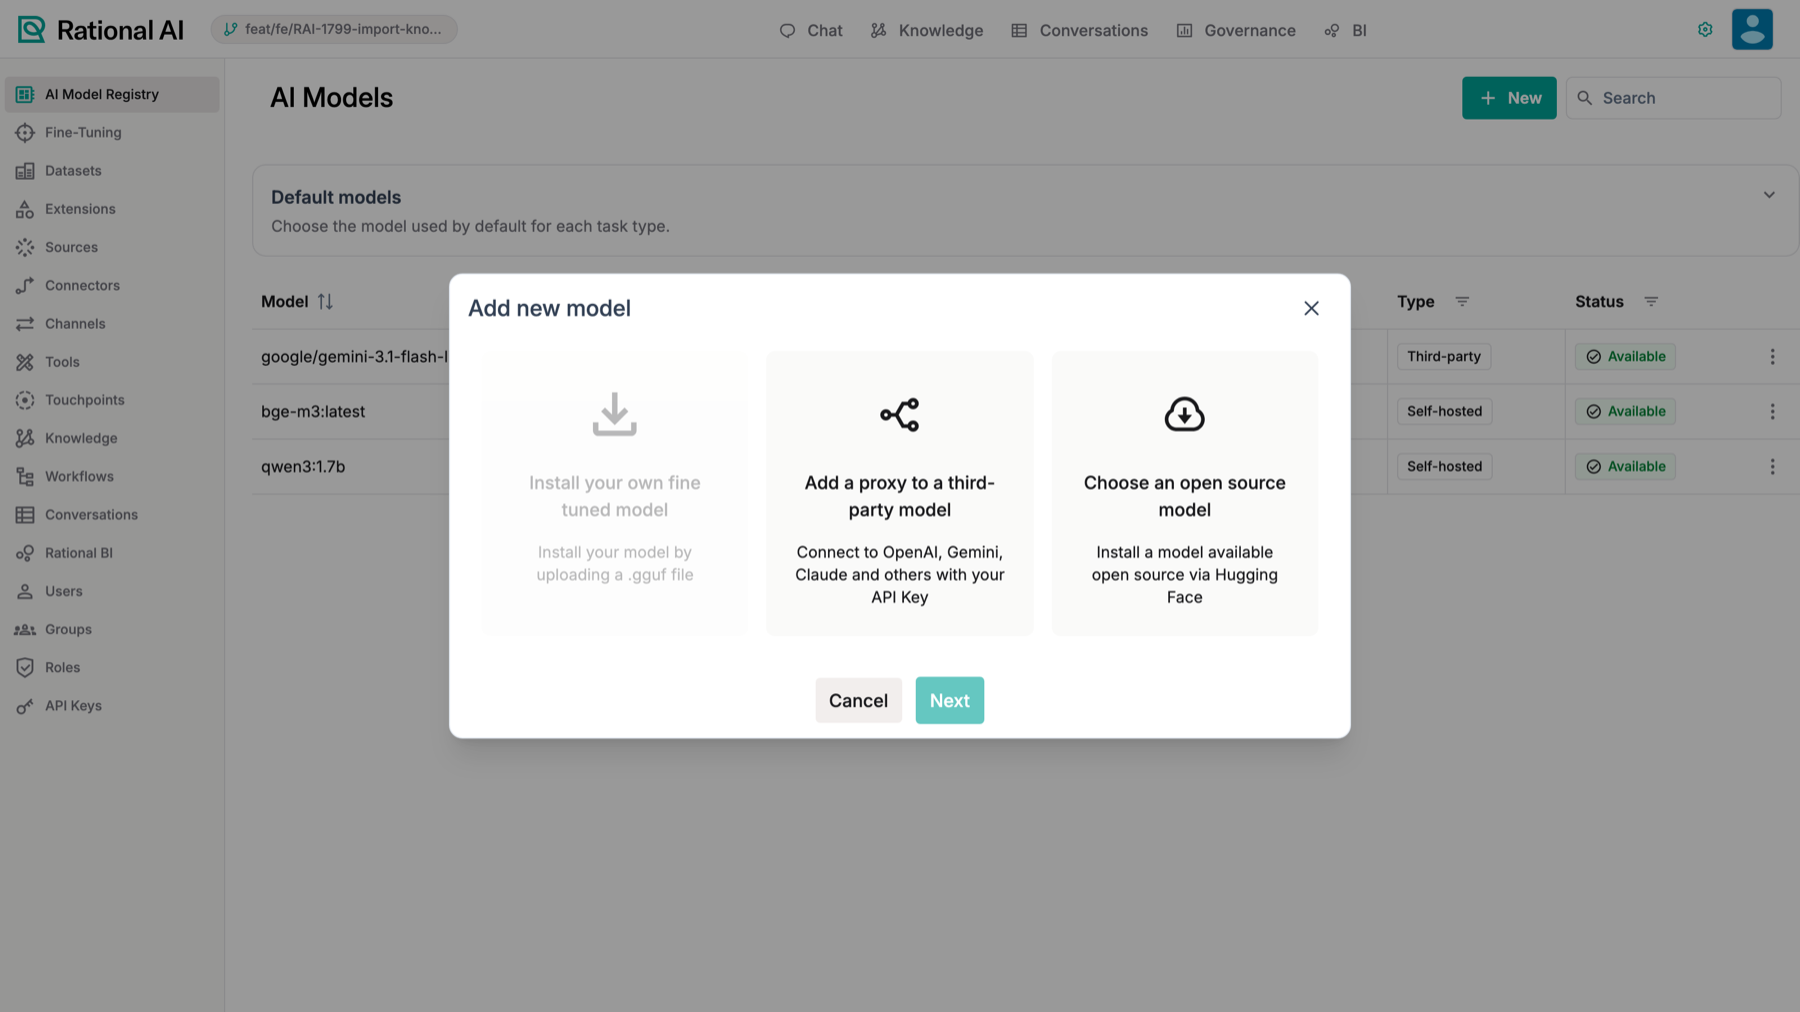
Adding a model: install your own fine-tuned model, proxy a third-party model (OpenAI, Gemini, Claude…), or pull an open-source model from Hugging Face.
See where a model is used
Before you change or remove a model, see what's leaning on it — so you don't quietly break a conversation or a Knowledge.
Scroll to the Used in section, below the overview. Each entry shows its kind, the roles the model fills there, and a link through to that consumer:
- Touchpoint — roles: default, available, sentiment, topic, title. A touchpoint is a configured entry point where users talk to the AI, such as a chat widget or channel.
- Knowledge base — role: embedding. An embedding is the numeric representation of text that powers search and retrieval.
- Conversations (room configuration) — roles: conversational, sentiment, topic, title.
- Fine-tuning — role: base model.
If nothing references the model, the section shows an empty state.
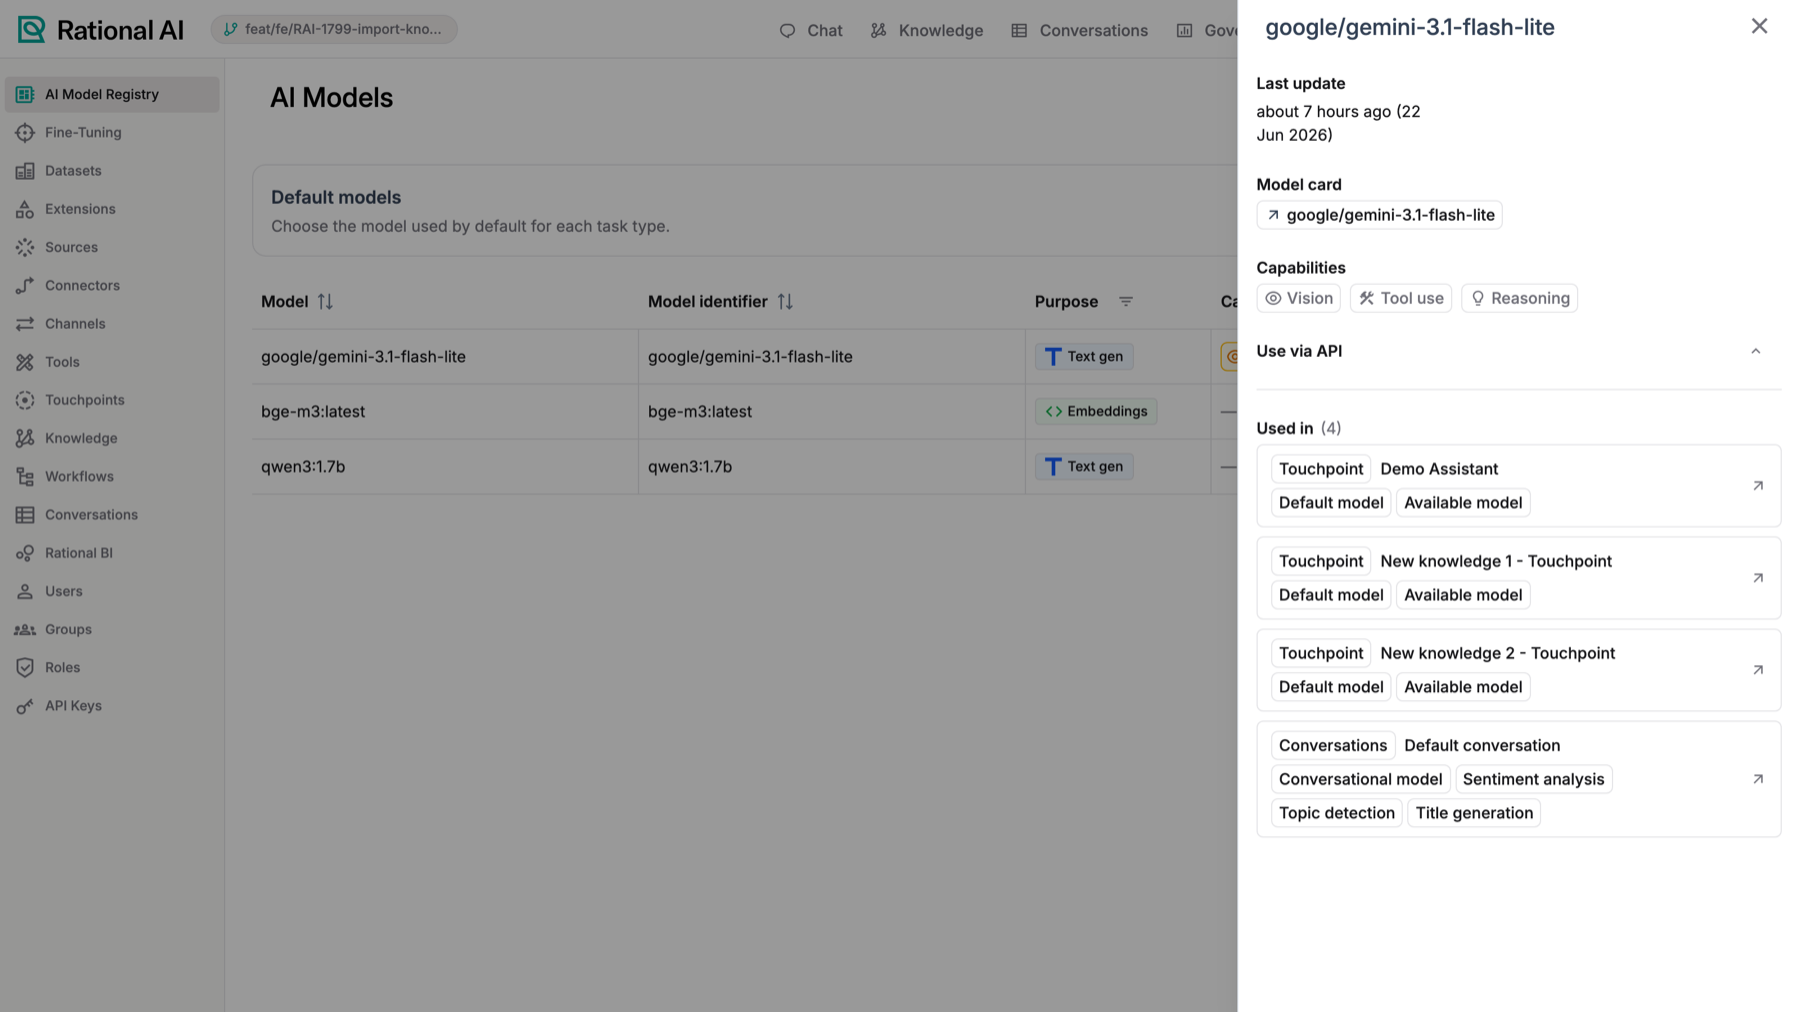
A model’s details: the Used in section lists every touchpoint and conversation that references it.
Document and approve a model
The registry answers which model, served by whom, on what hardware, at what price. A risk function or a public tender asks a different set of questions: which exact weights are running, under what licence, approved for what use and forbidden for what, with which known limitations — and who signed that off.
The Governance section of a model's drawer is where those answers live. It applies to third-party models too, which are usually the ones drawing the hardest questions.
The record
| Field | What it captures |
|---|---|
| Version | The specific release in use |
| Weights digest | The fingerprint of the exact weights running |
| Licence | The terms the model is used under |
| Provenance URL | Where the model came from |
| Intended purpose | What the model may be used for, in prose |
| Prohibited uses | What it must not be used for |
| Known limitations | Where it is known to perform badly or unreliably |
| Evaluation summary | What testing was done and what it showed |
Two near-identical names answering completely different questions:
- Purpose, shown higher up the drawer, is the technical modality — text generation, embedding, and so on.
- Intended purpose, in this section, is prose about permitted use — "drafting replies to customer email".
Removing exactly this ambiguity is what the governance record is for, so it's worth being deliberate about which one you're reading.
Documenting and approving are separate acts
Save writes documentation. Approve records a decision and stamps who took it and when. They're separate controls because they're separate acts, usually taken by different people — and folding them together would make "I changed the intended purpose" indistinguishable from "I approve the new intended purpose".
The approval state shows as a chip. It reads as satisfied only when the model is approved; not reviewed and withdrawn both read as a caution rather than a failure, since neither is an error — they're just not a sign-off.
Edit a substantive field on an approved model and the approval decays to not reviewed, clearing the sign-off stamp. The section warns you before you save and again afterwards.
This is the behaviour you want. An approval that outlives a rewrite of the thing approved is worse than no approval, because it reads as a decision somebody actually took. The case it guards against is repurposing: an approved model quietly edited from "drafting replies to customer email" to "screening job applicants", still wearing its sign-off.
Withdrawing an approval asks you to confirm first, and editing afterwards does not restore it.
Approve stays disabled until the model has an intended purpose. Approving a model for an unstated use isn't a decision anyone can act on later.
Set default platform models per task type
Pick the model the platform reaches for when a specific consumer hasn't pinned one of its own. These defaults are pure fallbacks: a touchpoint or Knowledge with its own model always wins.
- Go to Settings → AI Models.
- Open the Default models panel above the models table.
- Set any of these fields — all are optional and can be cleared:
- Conversational model — the default for conversations. Lists Text generation models. Used by chat when a touchpoint has no model of its own.
- Coding model — the default for code generation. Lists Text generation models. Stored for future use.
- Embedding model — the default for embeddings. Lists Embedding models. Used by knowledge creation when no embedding model is supplied.
- Image generation model — the default for image generation. Lists Image generation models. Stored for future use.
- Your selection is saved to the active platform configuration.
Only the Conversational and Embedding defaults are wired into chat and knowledge creation right now. The Coding and Image generation defaults are stored and shown so those features inherit them when they ship, but nothing consumes them yet.
Add a provider connector
A connector is the bridge between the registry and an external model provider. Open Settings → AI Models, start the Add connector flow, and pick the connector that matches your provider. The two below cover the cases where the setup isn't obvious.
Add Xference
Reach for Xference when you want a model provider running with nothing but an API key — no endpoint URL to look up or paste.
Xference is a one-click connector that uses a fixed OpenAI-compatible endpoint behind the scenes.
- In the Add connector dialog, choose Xference.
- Enter your API key.
- Save. The platform discovers the available models from the Xference endpoint and proxies chat through the same path as OpenRouter.
Xference currently resolves only its trial host (api-trial.xference.ai). There is no production host yet, so this connector targets the trial endpoint until one is available.
Add an OpenAI Compatible provider
Use this when your provider speaks the OpenAI API but isn't one of the dedicated connectors — here you supply the endpoint yourself.
- In the Add a new connector browser, choose OpenAI Compatible.
- Fill in both required fields:
- Base URL — the OpenAI-compatible endpoint of your provider.
- API Key — the key for that endpoint.
- Save. The connector behaves exactly like the OpenAI connector but talks to your custom base URL.
Result
You can now inspect any model's pricing, publisher, architecture, and usage from the AI Model Registry, set platform default models per task type, and add Xference or OpenAI Compatible providers so their models are available to your conversations and knowledge bases.