Use the chat
The chat is where you talk to your Rational AI agent. This guide covers the everyday experience: starting a conversation, lining up follow-up questions, exploring alternative answers, attaching files, listening and dictating, renaming chats, and — for support agents — stepping into a conversation the AI is handling.
The chat is the conversation view your end users see. Each chat lives in its own room tied to a touchpoint — a configured entry point that decides which AI model and which knowledge the chat draws on. The chat keeps your full message history and lets you regenerate, edit, and branch answers. Support agents can also step into a conversation the AI is running and take manual control.
Prerequisites
Before you start, make sure you have:
- Access to the chat: an account that can open the chat view.
- At least one enabled touchpoint: the touchpoint determines which model and knowledge the chat uses.
- For document attachments: files in a supported format — images, PDF, DOCX, or text / markdown / CSV / JSON.
- For takeover: an operator account with access to the backoffice conversation view.
Start a new chat
Every conversation begins by choosing who you want to talk to.
- Select New chat.
- The first time, a touchpoint picker opens. Choose the touchpoint you want to chat with.
- The chat opens with a personalized greeting instead of a blank prompt, sitting above the centre of the panel. The greeting is generated dynamically from the time of day (morning, afternoon, or evening) and your name, so the exact wording varies from visit to visit — for example "Hi Admin, what do you need this evening?", "Good evening, Admin.", or "Evening, Admin. How can I assist?".
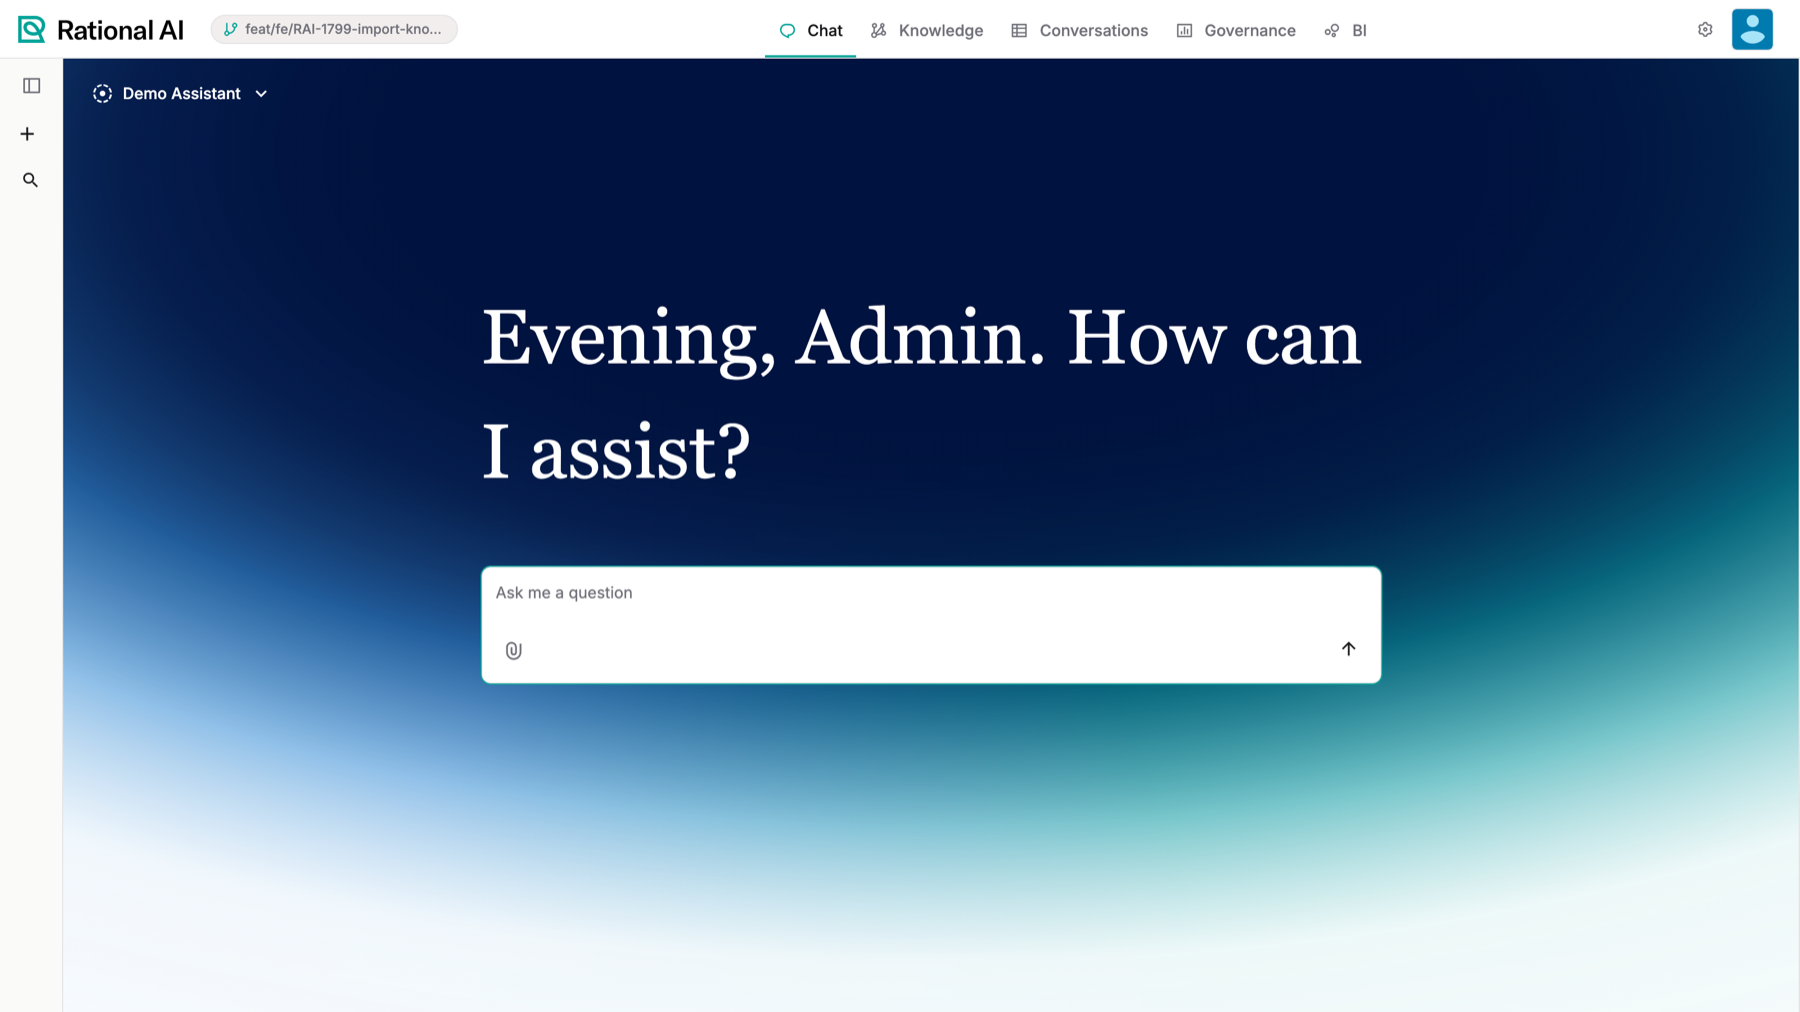
A new chat opens with a personalized, time-aware greeting.
The greeting is not limited to the chat page. It also appears in the chat panels embedded elsewhere in the product — inside a Knowledge, in a BI dashboard — including chats that don't exist yet, where nothing is created until you send your first message. Suggested questions are a separate thing and only appear where the touchpoint supplies them.
Rational AI remembers the last touchpoint you chatted with. The next time you select New chat, the chat is created directly with that touchpoint and the picker is skipped. If that touchpoint has since been disabled or deleted, the picker reopens so you can pick a valid one.
Send and queue messages
You don't have to wait for one answer to finish before lining up your next thought.
- Type your message in the composer and send it.
- While the agent is still generating its response, a second message can't be sent in parallel. Instead it's queued and shown as a removable chip above the input.
- Queued messages are sent automatically and in order as soon as the previous turn completes.
- To cancel a pending send, hover the chip and select the x. Hovering also shows the tooltip "Message waiting to be sent".
The queue is saved per chat in your browser, so queued messages survive a page reload or switching between chats, and resume sending once the agent is idle. Queued chips are text only — attachments apply to messages you send directly, not to queued ones.
Attach files to a message
Attach images and documents to a message so the agent can use them directly in its answer.
- In the composer, add one or more attachments — images, or PDF / DOCX / text / markdown / CSV / JSON documents.
- A preview of each attachment appears in the composer before you send.
- Send the message. Attachments are uploaded first, then linked to the message, and the chips also appear on the sent message in your history.
Images are passed to the model as vision input. For documents, the text is extracted in the background and fed to the model as reference content, so generation never waits on extraction.
Open an attachment
The chip on a message is a button: select it to get the file itself, not just its name.
- Formats the browser can display — PDFs, images, text, audio and video — open in a new tab as a preview.
- Anything else downloads under its original file name.
This matters most for files you never had a local copy of. When a conversation arrives through a channel — a document mailed in through an Email channel, a PDF sent to a Telegram bot — the chip is the only route to what the sender actually attached.
Document extraction is bounded by size, page, and character caps. For large or numerous documents you want the agent to search over, store them in a Knowledge instead — Rational AI indexes that content for retrieval-augmented answers (RAG), where the agent looks up relevant passages at answer time rather than reading whole files inline.
Work with answers: actions and branches
Beyond reading a reply, you can regenerate it, rewrite your own question, and compare different versions side by side.
Each AI message has a hover-revealed action row with regenerate, edit, copy, read aloud, Verify response, and a thumbs-up / thumbs-down pair for feedback, plus inline branch arrows ‹ › and a variant counter (for example 1/2) when alternatives exist.
Generate an alternative answer
Use this when an answer is close but you'd like to see how the agent would phrase it differently.
- On an AI message, select regenerate.
- A new variant is added and the counter updates (for example 2/2). The chat auto-advances to the newest variant.
- Use the ‹ › arrows to move between variants. If you navigate back to an older variant and regenerate again, you stay on the variant you were viewing.
Edit your message to branch
Use this when you want to rephrase a question and explore a different line of conversation without losing the original.
- On one of your own messages, select edit.
- An inline edit card opens with a hint that saving creates a new branch.
- Adjust the text and select Save (or press Enter).
- A new branch is created and the agent answers it. Attachments on the original message are carried onto the edited branch, so they survive the edit.
Rate an answer
Tell the agent's owners whether an answer worked. The two thumbs buttons on the action row open a short dialog rather than recording a silent vote, so a rating always comes with the reason behind it.
- On an AI message, select thumbs up (Give positive feedback) or thumbs down (Give negative feedback).
- For negative feedback, tick as many reasons as apply under Add details: Confusing, False, Offensive, Useless, or Other.
- Add an optional note — "What was satisfying about this response?" for positive feedback, "What was unsatisfying about this response?" for negative.
- Select Send. A Thanks for your feedback toast confirms it, and the thumb you chose switches to its filled icon so you can see at a glance which messages you have rated.
Closing the dialog with Cancel, the ✕, or the Escape key sends nothing at all — no rating is recorded from opening the dialog alone. Only Send submits, and if it fails you are told so ("Could not submit your feedback. Please try again") rather than being left thinking it went through.
Listen and dictate
The chat can read answers out loud and take messages by voice instead of typing.
Read an answer aloud
Every assistant message carries a read aloud action in its hover row, next to copy. Select it and the answer is spoken, with an equalizer showing while it plays.
Markdown is stripped before anything is read, so fenced code blocks and link targets aren't spelled out character by character.
An Italian answer is read in Italian even if you're using Rational AI in English. What's spoken is the language of the text, not the language of the UI.
Playback also starts before the whole answer has been synthesised — the reply is spoken in sentence groups, with the next fetched while the current one plays, so you hear the first words after about a second rather than waiting for a long answer to render in full.
Dictate a message
Press the mic button in the composer, or hold Ctrl+Shift+D. The composer becomes a recording bar with a live waveform and three actions: discard, stop, and send.
- Stop drops the transcript into the message box, so you can correct it before sending.
- Send posts it straight away.
Dictation works in both composers — inside an existing conversation, and on the new-chat screen, where the transcript starts the chat exactly as typed text would.
Set the audio language
The composer's tools menu has an Audio language entry with three options: detect automatically (the default), Italian, or English. Your choice is remembered and applies to both dictation and reading aloud.
Automatic really is automatic in both directions: each recording is detected as it's transcribed, and the language of an answer is detected from the answer itself — falling back to your own locale only when a message is too short to identify.
Choosing Italian or English explicitly skips the detection pass, which is worth roughly 40% of the transcription time. If you always dictate in the same language, pin it.
Inside a conversation, anyone who can use that conversation can dictate into it — including a visitor on an anonymous touchpoint.
On the new-chat screen there is no conversation yet, so dictation there requires a signed-in account. Creating a conversation just to hold a recording would leave an empty one behind every time someone discarded the text.
Rename a chat
Give a chat a clear title so you can find it later — type one yourself or let the agent name it for you.
- Open the Rename chat modal for the chat.
- Edit the title manually, or select the Generate with AI spark button to the right of the title input.
- When you use Generate with AI, the icon shows a loading throbber while the title is regenerated, then the AI-generated title replaces the input text and the field is marked as AI-generated (purple background).
- Save the new title.
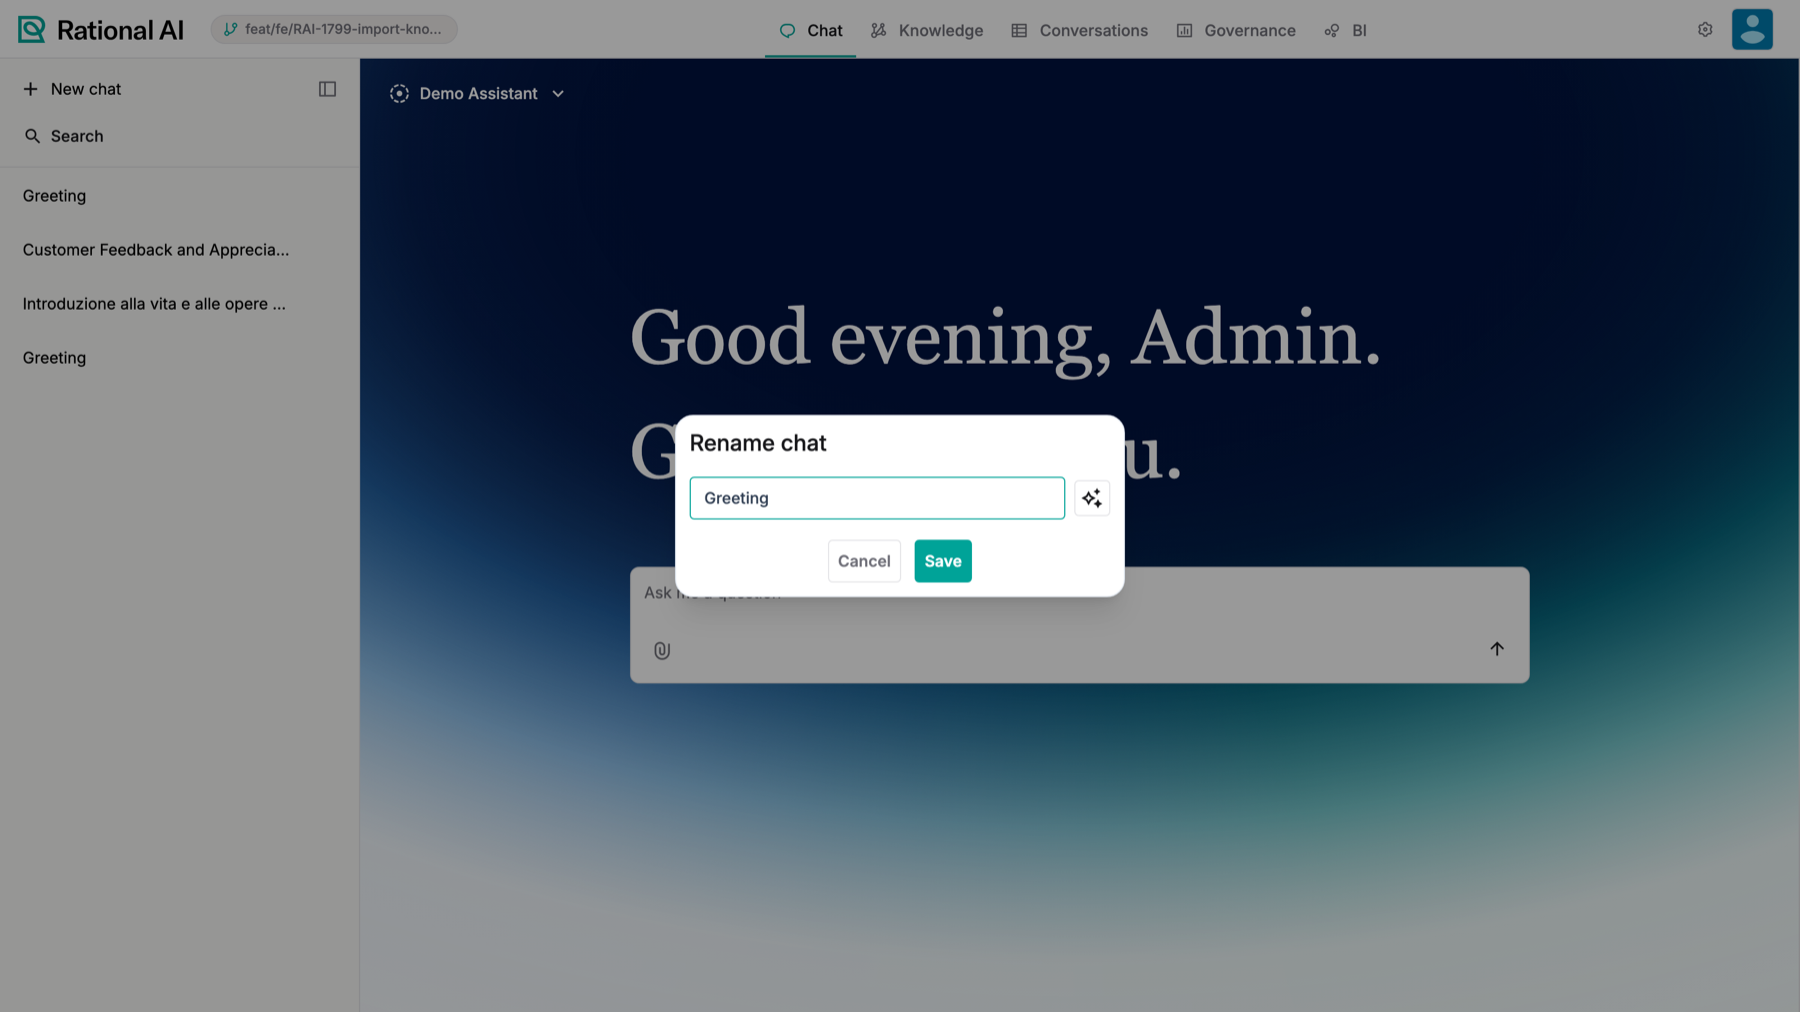
The Rename chat dialog. The spark button to the right of the field regenerates the title with AI.
Take over an AI-managed conversation (agents)
In the backoffice conversation view, the AI answers automatically while the room is assigned to it. The composer is disabled with the hint "Take over the conversation to reply". The sections below cover stepping in and reviewing what the AI has handled so far.
Step in and reply
Take over when a customer needs a human — a sensitive case, an edge case, or anything you'd rather handle yourself.
- Select Take over conversation. The room is assigned to you, the AI pauses, and the composer is enabled.
- The button toggles to Release conversation (with a sparkles icon). Reply as needed.
- When you're done, select Release conversation to hand control back to the AI.
Takeover is exclusive. If another operator has already taken the conversation, your takeover is blocked with a toast. Control never returns to the AI on its own — it returns only when you explicitly release the conversation.
Read the AI conversation summary
Before stepping in, get up to speed in seconds with an AI-written recap of the conversation so far.
- Select Summary to open the conversation summary modal.
- The modal shows a read-only, AI-generated summary covering the main problem, key points, and resolution status. A resolution status badge (Open / In progress / Resolved) and the room sentiment badge are shown.
- Select Copy summary to copy it, or take over the conversation directly from the modal.
Summary behavior is governed by the Summary generation settings section on the Conversation Settings page, where you can toggle generation and set the model, the number of messages to consider (0 means all), and the prompt template (with a restore-default option).
Result
You can hold a full conversation with your Rational AI agent: start a chat with a personalized greeting — on every chat surface, including one that hasn't been created yet — line up follow-up messages while answers generate, attach files, explore and branch alternative answers, rate an answer with a reason attached, rename chats with AI-generated titles, and — as a support agent — take over a conversation and review its AI-generated summary before stepping in.