Access Rational AI via API
Rational AI's models are available not just in the chat interface but also to your own code. This guide walks you through creating the key your application needs to authenticate, and finding a working code snippet for any model.
An API (Application Programming Interface) is the channel your own applications and scripts use to talk to Rational AI's models directly, instead of a person typing into the chat UI. You prove who you are with an API key — a long secret string you generate in Settings — and send requests to your workspace's gateway.
That gateway is OpenAI-compatible, meaning it understands the same request format as OpenAI's widely-used API. The practical payoff: you can reuse the standard OpenAI SDKs (the official code libraries) and existing tooling without writing anything custom.
Prerequisites
Before you start, make sure you have:
- Access to the API keys settings page. The API keys entry must be visible in your Settings navigation.
- At least one active model. A model configured in the AI Model Registry that you intend to call. See AI Model Registry features if you need to set one up.
- An HTTP client or OpenAI SDK. For example cURL, the Python OpenAI SDK, or the TypeScript OpenAI SDK.
Manage your API keys
Your API keys live on a dedicated settings page that lists every key with its name, a masked value, and the date it was created. From here you create new keys and revoke ones you no longer trust.
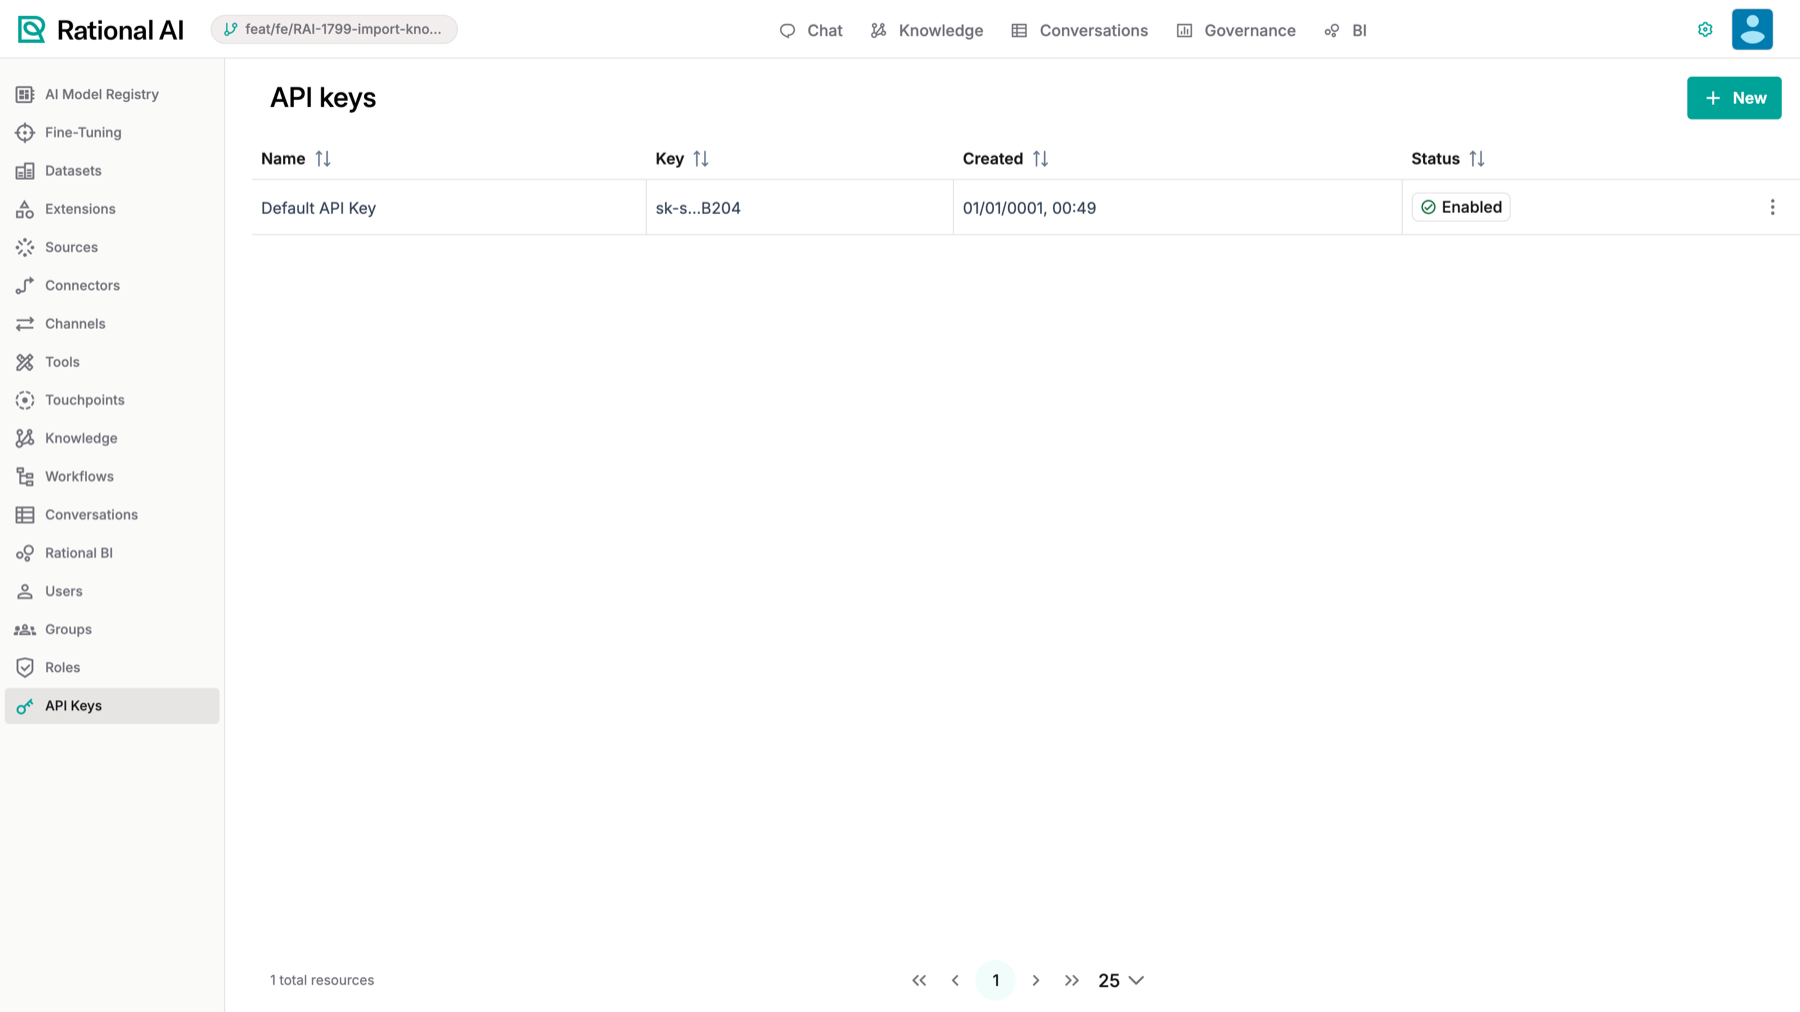
The API Keys page: create and manage the keys used for programmatic access.
Create an API key
Create a key whenever you have a new application, script, or person that needs to call the API. Giving each its own named key makes it easy to track usage and revoke access later without disrupting anything else.
- Go to Settings → API keys.
- Select + New (shown as + Add new when the list is empty).
- In the Generate new key dialog, enter a name for the key, for example
My personal api key. - Confirm to generate the key.
- A one-time secret dialog appears showing the full key. Use the copy-to-clipboard button to copy it, then store it somewhere safe.
The full key is returned a single time, on creation. Once you close the one-time secret dialog, the list only ever shows a masked value — there is no way to reveal the secret again. If you lose it, revoke the key and generate a new one.
Revoke an API key
Revoke a key the moment it is no longer needed or might be compromised — for example a key that was committed to a shared repository or belonged to someone who has left.
- Go to Settings → API keys.
- Find the key in the list and start the revoke action.
- Confirm in the Revoke API key dialog.
Revoking an API key is a hard delete, not a pause. Any application still using that key stops working immediately, so make sure nothing you depend on is still relying on it.
Call a model
With a key in hand, the fastest way to get a request working is to copy a ready-made snippet for the exact model you want, then plug in your key.
Find the code for a model
Every model in the registry comes with a snippet you can copy and run, pre-filled for that specific model.
- Open the AI Model Registry and select the model you want to call to open its details drawer.
- In the model overview, find the Use via API section below the capabilities block and expand it (it is collapsed by default).
- Choose the tab for your language:
- cURL
- Python (OpenAI SDK)
- TypeScript (OpenAI SDK)
- Use the copy-to-clipboard button on the snippet to copy it.
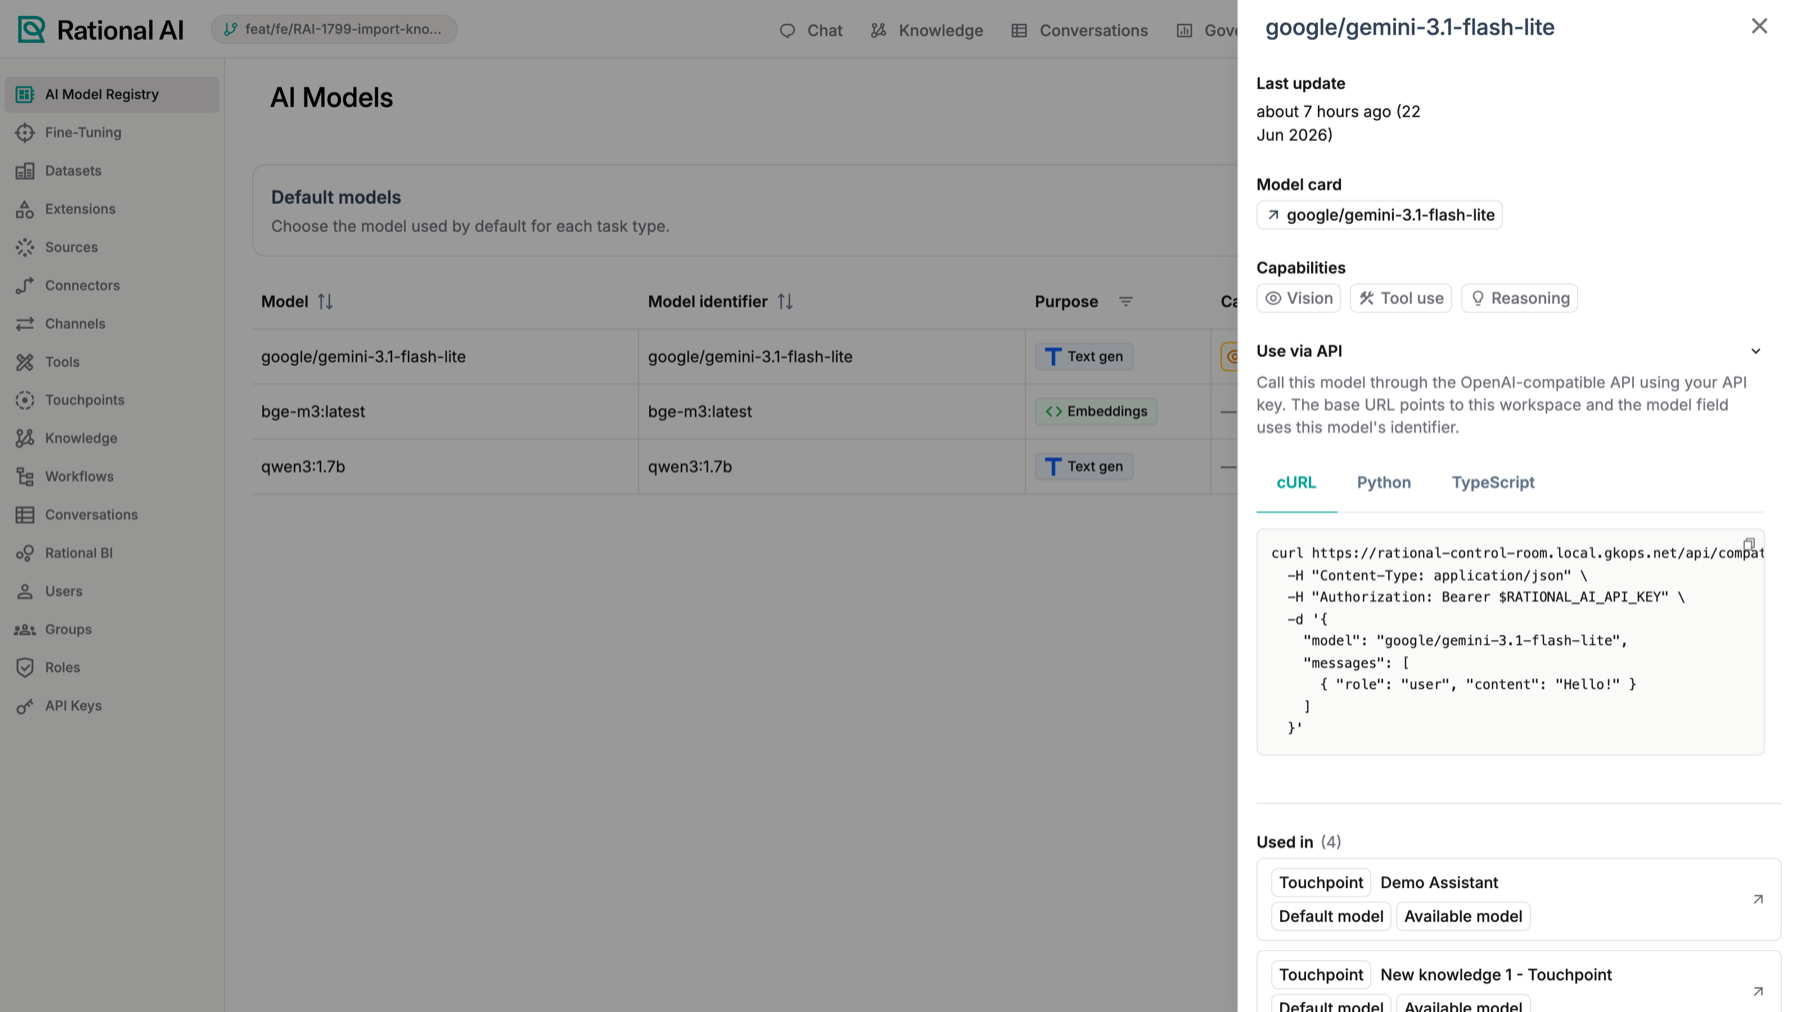
Use via API: ready-made cURL, Python and TypeScript snippets that call the model through the OpenAI-compatible API.
Each snippet points at your workspace's OpenAI-compatible endpoint group at /compat/v0/openai (for example /api/compat/v0/openai/chat/completions). The request's model field is already set to the model's identifier, which the backend uses to route your request to the right model — so you don't have to look it up yourself.
Authenticate your requests
Requests are authenticated with the API key you generated, passed as a Bearer token — a standard way of attaching a secret to an HTTP request in its Authorization header:
Authorization: Bearer $RATIONAL_AI_API_KEY
Set the RATIONAL_AI_API_KEY environment variable (or your own secret store) to the key value from the one-time secret dialog. The copied snippet reads from that variable, so once it's set the snippet authenticates on its own.
Choose between chat completions and responses
The gateway serves both of OpenAI's APIs side by side, so you don't have to rewrite an application around whichever one Rational AI happens to prefer.
| API | Endpoint | Reach for it when |
|---|---|---|
| Chat completions | /compat/v0/openai/chat/completions | You have existing code built on it, or you want the simplest possible request |
| Responses | /compat/v0/openai/responses | You're starting fresh, or using an OpenAI SDK's default path — Responses is the API OpenAI documents first and its SDKs reach for by default |
Both are available on your workspace endpoint group and on a per-touchpoint group. The ready-made snippets in the registry use chat completions; switching to Responses is a matter of changing the endpoint and the request shape, with the same key and the same base URL.
The Responses endpoints
| Endpoint | What it does |
|---|---|
POST /compat/v0/openai/responses | Create a response, streamed or not |
GET /compat/v0/openai/responses/{id} | Retrieve a stored response |
DELETE /compat/v0/openai/responses/{id} | Delete one |
POST /compat/v0/openai/responses/{id}/cancel | Cancel a background response |
GET /compat/v0/openai/responses/{id}/input_items | List a response's input items |
Model resolution, request overrides, touchpoint attribution and governance capture work exactly as they do for a chat completion — a response is recorded with its usage, cost and time to first token like any other call, so nothing disappears from your governance reporting by choosing one API over the other.
Responses are addressed by id, and the id you receive is minted by the gateway — a resp_ value identifying the call as Rational AI recorded it, not the id the upstream provider used internally.
This is what makes the follow-up operations work at all: a gateway id resolves to exactly one model and one provider, while a provider's id promises nothing of the sort — two accounts on the same provider number their responses independently.
Practically, it means two things. Chaining works normally: pass a previous_response_id you were given and it's translated back on the way through. And an id the gateway didn't mint is not found — you can't hand it an id you got from somewhere else, and you can't reach another touchpoint's responses with a touchpoint key.
Past creating a response, these operations reach whatever the upstream provider actually supports, and the gateway forwards its answer as-is.
OpenAI stores responses, so retrieve, delete and cancel behave as documented. Ollama implements only response creation and returns 404 for the rest — which you'll see verbatim. If your application depends on retrieving or cancelling a stored response, check that the provider behind your model supports it before building on it.
Result
You now have an API key for authenticating programmatic requests and a copied, model-specific snippet pointing at the OpenAI-compatible gateway. Your application can call Rational AI's models directly, reusing standard OpenAI SDKs and tooling — through chat completions or the Responses API, whichever your client already speaks.